Monday, July 25, 2016

Try Out the Un-Washed Look

I have a "dirty" little secret to tell you. But before I let you know, I want to clarify that this is not dirty at all. Shampoo is a scam! (Maybe it isn't a scam, but it is a waste of money.)

This hair has not used shampoo in over four years!
On my path to a cleaner life, after ditching disposables and detoxing my cleaners, I became interested in what we put in and on our bodies. I started searching for all the products I used on a cosmetics database. I read articles about products we use and what they contained. As much as I can tell, there isn't anything deadly about the products we use, but there is a significant amount of proof that they do contain things that are dangerous in large doses, or at least not healthy. I know that injecting a chemical into small mammals in large doses would be dangerous no matter what, and of course everything causes cancer in the state of California, but there is some truth there. Most people shower or bathe daily in the US. In that shower, we slather our hair with shampoo, often rinse and put on conditioner, scrub with a soap, wash with face wash, lather with lotion, slide on deodorant, and decorate with gels, sprays, powders, and pastes. Add all of these products, many containing the same ingredients, and now multiply daily. Those tiny amounts of chemicals are now starting to add up.

Here are some steps to smart product choices.

Saturday, July 23, 2016

Summer is Getting a Bit Spicy

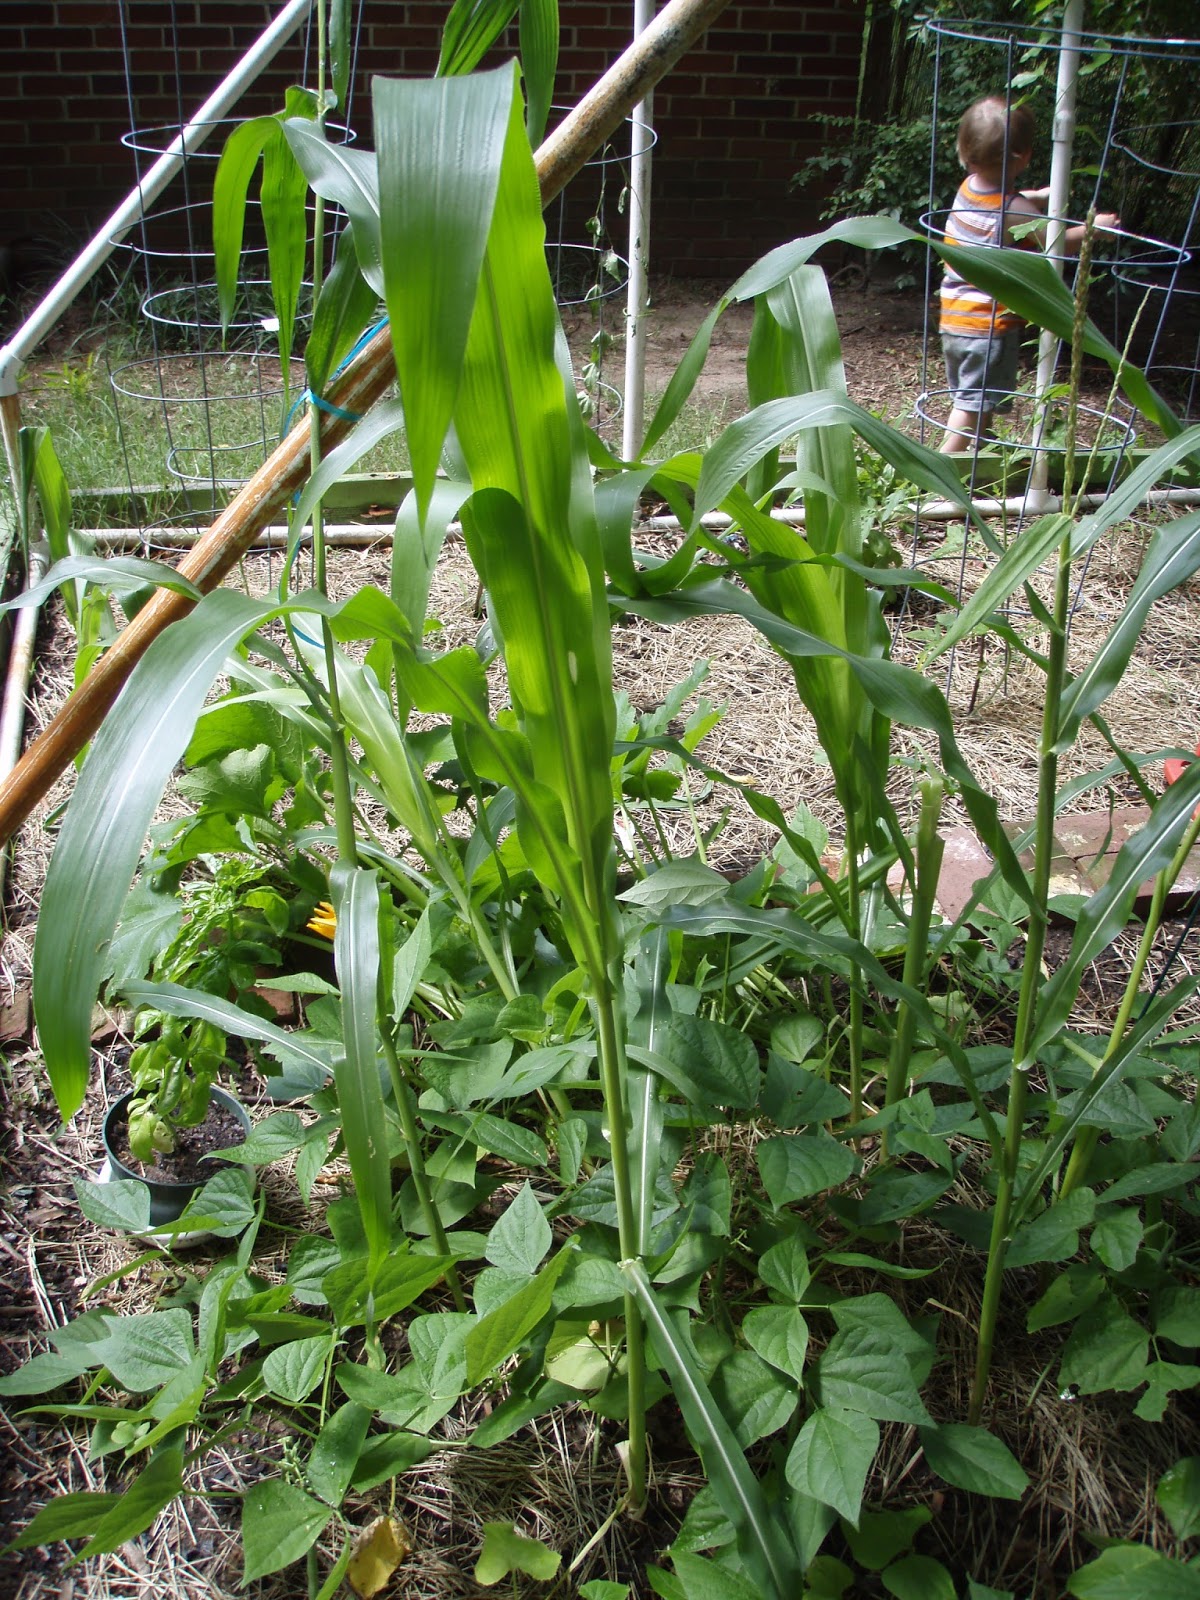
This summer is "hot, hot, hot," as my husband would say. I read yesterday about the "heat dome" that is covering central and southern United States. As a result, I haven't had much to harvest. Severe storms have knocked over the corn, the heat has rendered the tomato plants infertile, and it is just way to hot to get outside and do regular maintenance.

After my decent green bean harvest, there hasn't been much coming from the garden. Even the herbs are looking pretty tired. I let some go to seed and others I've been pinching back to keep going. I will share some herb tips later this year.

For now, I want to know your favorite recipe for jalapenos. I harvested these four this morning and am undecided as to what to do with them. I would love your input!

Monday, July 18, 2016

Decorate with your Favorite Jewelry

Those who know me, know that I am not much for accessories. I have a few favorite necklaces and some stylish earrings. Honestly, I've worn the same hoops for about two years without removing them. I never seem to like the way earrings look now that I have to wear my glasses. (Contact lenses were expensive and wasteful, and so uncomfortable. After using them for 13 years, I had to stop.) One reason I don't like to wear jewelry is I because I hate digging through boxes to find what I want. Even if I found what I wanted, it was probably tangled. There is no justifiable reason for me to buy a giant jewelry case, and it just causes more clutter. So I found this great idea on Pinterest.


This project is super simple and lots of fun. You need:

Friday, July 1, 2016

Washable Wipies

Reusables are possibly the easiest change a person can make at home. I'm pretty sure no one ever said, "I love driving by the landfill, I can't wait until it gets bigger." The truth is, I'm not sure people really think about landfills, unless they drive by one regularly. If this is the case, I'm sure it is easy to notice just how quickly they grow. This is not even to mention the really awful smell if you forget to turn the air in your car to internal before you pass by. So what can one person do against a literal mountain of trash? Find something you throw away most, and see if you can replace it with something you can reuse.

This was very easy for me at first, as I lived only on a university stipend when I had my first apartment to myself. The first thing to go:  paper towels. Growing up at home, we always tore the paper towels in half to make a roll last. (This was before the new smaller ones existed.) While on my own, however, I decided it was pretty silly to use a paper towel to eat my pastry each morning. What on earth is wrong with using a plate and just rinsing it off? Plus, my dog was house trained and it was only her and me. There were not a lot of messes to be cleaned up.

This decision has been harder to maintain with a bigger house, bigger family, and bigger messes. But I am happy to say paper towels are still banned to this day. Messes are handled with newspaper, towels, and baking soda (which soaks up liquids like pee and turns solid so you can sweep it up and clean the surface). There are many other disposables to ditch too. Starting with plates, utensils, and napkins, and moving on to cotton balls, menstruation items, and diapers. Before you throw out the toilet paper, though, you might want to start with something a little easier to lose.

Sunday, June 19, 2016

How Clean is Clean?

I once read a review for a dish washing soap made by Seveth Generation. The reviewer's comment included a statement regarding how the detergent wasn't the most effective she had used, but it got things clean and her kid wouldn't die if he ate it. At the time, I didn't have kids, but I had dogs and sugar gliders. The comment made me laugh, but it also made me think. I was also toying with the idea of putting the dishwasher drain through a homemade filter in the backyard to use in the garden, and wasn't sure what would be safe to put on the plants. All of this led me to the term:  biodegradable. Here is what Google has to say:

bi·o·de·grad·a·ble
ˌbīōdəˈɡrādəb(ə)l/
adjective
  1. (of a substance or object) capable of being decomposed by bacteria or other living organisms
The original use of the term applied to things made by nature, and therefore easily destroyed by nature. But, we now manufacture biodegradable products by using natural materials (wood to paper, vegetable oils to soap). For other products, chemicals and non-biodegradable materials are used. These substances are not easily broken down in our environment and as a result remain, build up, and cause negative impacts.

Having a clean home is universal throughout the globe. Standards of clean may vary, but the idea is generally the same. Clean might be lighting incense and using herb oils to purify, or it might be using an air purifier and a spray cleaner. Each culture has its own beliefs about what clean is and how one can accomplish it.

Friday, June 17, 2016

First Vegetable Harvest: Beans from Bush to Plate

I was so excited today to walk in my garden after a long weekend away and find the bush beans had gone from blooming to bearing. I have some photos to show the "processing" of the beans from garden picking to preparing for lunch.

My beans are growing in a "three sisters" mound. You can read more about this in my post about planting the three sisters.

Wednesday, June 15, 2016

Planting the Three Sisters

In the Americas long ago, and even modern day in some cultures, people relied on the Three Sisters to feed themselves. The sisters are corn, squash, and beans. This combination has proven to be a secret to balancing a diet when consumed together. The good news, is they thrive when they are planted together.

I have read about this often as I taught Native American History to elementary students. I was always fascinated by the knowledge that cultures had so long ago. I remember reading about how Squanto had helped the Europeans farm successfully, teaching them to plant fish under the corn seeds in a mound. Now, we buy special fertilizers made from fish emulsions to avoid chemical fertilizers. Listening to the past can be so valuable.

Sunday, June 12, 2016

Yes, home birth is still a thing.

If you are not interested in childbirth or ever having children, you might want to skip this post. I do want to mention, however, that this is a part of that "living" thing I mentioned earlier. I'm sure the single life is really great (truly the fantasy has crossed my mind). For a lot of people, those hormones and internal instincts to mate and multiply are just too strong. This can make living consciously more difficult. So if your subconscious is winning, then you just have to be more conscious.

To start with:  pregnancy and childbirth.

Disclaimer:  

Any way that you manage to survive pregnancy and/or childbirth is your business and either way, the result usually has the same moving parts and abilities. I admire all moms, and I believe childbirth should be how you want it to be. I in no way judge any mother (although I do not approve of those on drugs, or who are purposely abusive or negligent). If you had a baby, that's awesome. It he/she was planned, even better! Congratulations!

Hopefully you read the disclaimer above, so I can now let you know that this information is fact and opinion. I am not a doctor or a midwife, just a mom who read books and did research. If you disagree with anything I say, then I applaud you for having your own mind. Do your research and follow your path.

Natural Process or Medical Procedure

I see the world of health as things that happen, and things that people do to "help" things happen. For example, we all had baby teeth. We hopefully have lost all of those baby teeth. Did yours just fall out? Well, hardly any of mine did. My first three were extracted by a nun at my school. The next several were removed with much pain and suffering at the hand of my awesome mother who tried everything. My teeth just wouldn't leave. Finally, by the age of 14, I was able to remove my own, last baby tooth. This is supposed to be a natural process, and it was except for the fact that I never wanted to go through any pain, and would leave the tooth in too long. Now that I have worked for a dentist, I know that you simply push for 15 seconds, then pull the other direction for 15 seconds. Do this for a few days and out comes the tooth. (The quick wiggles are painful and useless.) Conclusion:  our body is prepared for this process, it is natural, but sometimes you need to intervene to make it easier/better/less painful/etc.

On the flip side, there are wisdom teeth. The fact that many people have none or less than 4 shows that in our genetic past, there was a selection occurring to favor people with no wisdom teeth. Our skulls were using a lot more space for brain capacity and no longer needed the massive, extra teeth to help masticate tough, uncooked fibers. So, removal of these teeth is not so natural. It usually involves sedation/anesthetic and a professional surgeon. Very, very few people can avoid this medical procedure. Conclusion:  you need to intervene to survive this one.

Lets slide this analogy over to childbirth. (Sounds crazy, but bear with me.) For many, many years, just like losing baby teeth, mothers have given birth through a natural process, but usually with some intervention/assistance (here is that mom who tries everything). Our bodies were made for childbirth, just look at our awesome pelvis. Now here is the but:  sometimes things don't go "natural" and you need a medical professional to intervene. Even in our far away past, some mothers were faced with complications that often took their lives. Sometimes the natural process is interrupted and natural childbirth is not an option. But sometimes is not as often as you would think.

There are preventative measures that help (like pushing on a loose tooth for 15 seconds). Read, read, read! I read several books on childbirth and will mention them at the bottom of this post. One book actually theorized that the number one cause of Cesareans is the couch. Our bodies can run a marathon, but would you run one tomorrow without any preparation? Childbirth is your marathon and you have many months to prepare (whether you're going to the hospital or staying home.) You will use muscles you have never used before, and didn't even know you had. Start those Kegels now, even if you're not pregnant and don't plan to be. Can anyone predict if your childbirth will be like pulling baby teeth, or pulling wisdom teeth? Perhaps not always, but you can do a lot to make things more natural.

Childbirth "Preppers"

Too often people think childbirth is this really awful thing that you have to go through and the doctor, or at least the nurse, is in control. This view removes the mom from the equation completely. Moms have a job to do too. And personally, I wouldn't want someone else to control the process. The most important person during childbirth is the mom. So you can earn that position of control by taking it early on. Keep a journal, record everything, and learn as much as you can. Once your mind is prepared, prepare your body.

Getting your body in shape will greatly reduce some issues that might lead to extended labor and/or a Cesarean (I'm not a doctor, this is based on research from all of my reading). I did prenatal yoga at least 10-15 minutes each night, sometimes up to 30 minutes. It doesn't sound like a lot, but you try strapping a 30 lb beach ball to your stomach and doing yoga. Certain exercises will improve your strength, loosen that pelvis, and even put the fetus in an ideal position for birthing. Women who have a home birth on purpose know about these things and prepare for their birth. State law will not allow midwives to plan a home birth on anyone considered "high risk." They are also required to recommend transport if any issues arise during labor. So if your body is not doing the "natural" thing, you seek medication/sedation and that professional surgeon (think wisdom teeth).

Another preventative measure is diet. Diet is huge. Your body can do this naturally if it has the right ingredients. I took approx. 2,000 mg of vitamin C each day*, more if I felt like I was going to get sick. This does four things. It boosts immune system functions and increases iron absorption. It strengthens your water sack, so hopefully no early water breakers. It also has an added perk, it is a digestive mobilizer! Nothing is worse than constipation while pregnant, there already isn't enough room in there. Also, general prenatal vitamins are awesome, but don't get one with more than about 30% daily iron. Iron in vitamins causes constipation. Instead get your iron from natural sources that balance the iron with fiber like molasses, dark leafy greens, etc. Eat as many fruits and vegetables as you can. There is so much that we can get from good food. Buying sustainable is always best and at all costs avoid pesticides. Drink water until you think you have had too much, then drink some more. Buy a water filter, you'll need it later anyways if you do formula. Try to stick to a minimum of 80 oz. I did this by taking a 20 oz bottle of water to work, plus two 16-20 oz bottles of tea that I made each morning. Mother to be Tea is awesome. I also drank mixtures of other herbal teas like lemon balm, dandelion, nettle, and chamomile. I drank a glass of water with breakfast and several when I got home. Your body adjusts to water if you keep it up. I drank a lot before pregnancy so my body was already ready. You may pee a lot at first, but then it balances (until the end, when it doesn't matter what you do you will pee every hour). Be that weird person who smiles at clear pee in the toilet with pride.

Home Birth

On to the home birth. Just like women with obstetricians, we go to regular appointments where we are surveyed about our diets and any symptoms we are having. Our blood is sent off for analysis. We do a home blood sugar test with apple juice. Our blood pressure is checked, our bellies measured, and the heartbeat is monitored. Months are spent building a relationship with a midwife and meeting with other mothers to learn about and discuss our pregnancies. It is comforting to have women around you who know what you are going through, and who have often been through it all already. The relationships are priceless! (These classes are available for anyone who is pregnant, even planned hospital births. Get a doula for the hospital birth, and the relationship and support will be there with you.) Prep kits are ordered and delivered and usually, everything is ready before the big day. I say usually because my experience wasn't quite the norm.

During my appointments, my belly consistently measured a centimeter or two past my number of weeks. I really had no idea when my due date was. It was tricky to calculate with my erratic periods after leaving the pill. But that measuring tape was actually doing its job, because what we thought
was 35 weeks and 2 days was actually closer to 38 weeks when he was born. As my midwife always said, denial is a powerful medication, and boy did it work. I just knew it wasn't time yet and I managed through the morning with contractions, but didn't know what they were. I was uncomfortable. Every now and then I would stiffen and my back felt like it was trying to remove itself from my body. But I would just lay on my side or squat against the door jam. Finally, I called and told my midwife what was going on. She rushed over and checked me to find I was already 6 cm! All of a sudden this shit got real. Now I was in pain. I couldn't stand, squat, or lie across a yoga ball. I thought I was going to break in half. Within two hours, I welcomed my son into the world. His first world was my bedroom. I was on a birthing chair; my mom on a yoga ball in front of me sustaining the massive bruises I gave her as I gripped her legs. My husband was behind me on a chest pushing as hard as he could on my lower back, and the midwife was in front to the side. She quickly caught him, as he didn't pause for his shoulders. He wanted free. I held him skin to skin while the others just looked on in awe of his perfect self. Once the cord stopped pulsing it was cut. The midwife helped me finish up and then we laid him down for inspection. He was swaddled, and went to Dada. I am not going to lie, all my preventative measures and I still had six stitches. So, no, it is never perfect.

Again, this is not the norm. But, if you do some reading, you will find that many extended labors could be avoided by controlling the setting, lighting, mood, and companions. It is called the sphincter law. Ever try to poop in a public restroom? Isn't it more difficult when someone walks in? That's because everything tightens. Well, so does your cervix every time someone walks in the room, or lifts your skirt to check on progress. Moms need to stay relaxed and open, even in a hospital. And remember, denial is the best medicine, just download a contraction timer app on your phone and get real when the timing is right.

In hind sight:  I was extremely uncomfortable the day before. I couldn't sit down or lie down comfortably. Walking seemed to help, but I was bordering miserable. I went in the garden and picked blackberries and made a cobbler. Then, at approx. 4 am, I woke up starving and ate a bowl of cereal. At 7 am I was getting out of bed and my water broke, but everyone just told me I had wet myself because it wasn't time. Put all this together, and I had plenty of clues. It was building for days, but active labor was approximately 6-7 hours. That night I ate fresh blackberry cobbler and ice cream while soaking in my herbal bath.


My favorite parts of my home birth:  no bumpy car ride, no strangers, no bright lights, no hospital bed, no beeping monitors, no IV, no one telling me I can't eat or drink, no snatching of my baby before I can hold him, no car seat ride with big bulky buckles and straps, no awkward hospital visits where there is not enough seating for visitors.

Would I do it again? Yes, but someone else needs to handle the newborn, because that's where I suffered most. I'll talk about postpartum depression at a later date.

My favorite books (most available on Kindle):

The Natural Pregnancy Book: Herbs, Nutrition, and Other Holistic Choices
Aviva Jill Romm

Ina May's Guide to Childbirth: Updated With New Material
Ina May Gaskin

Yoga Mama, Yoga Baby: Ayurveda and Yoga for a Healthy Pregnancy and Birth
Bachman, Margo Shapiro, Lad, Dr. Vasant

The Birth Partner - Revised 4th Edition: A Complete Guide to Childbirth for Dads, Doulas, and All Other Labor Companions
Simkin, Penny, Harvard Common Press

Herbal Healing for Women
Gladstar, Rosemary

-I also watched tons of Call the Midwife. It is an awesome show. I know it is fiction, but they deal with real issues that you can research on your own.

*While I was pregnant, I was told that up to 10,000 mg of vitamin C was safe. If you get too much you just pee it out. I am now finding articles stating that only up to 2,000 mg is safe and only 85 mg is recommended for pregnant mothers. These articles list several side effects of vitamin overdose (most occurring with calcium or iron). I never experienced these, and do not feel that any ill was caused by my dosage, however, please consult your doctor or midwife before adding any supplements.

Wednesday, June 8, 2016

Minimalize for Space

It doesn't have to be messy to be cluttered!

Clutter is a life-long battle. It is so hard not to accumulate as time passes. You walk through the store and see so many shiny things. Look at that bowl, it really matches my napkins. Speaking of bowls, here is a cleaner made especially for toilets. Now that I'm thinking of my bathroom, I think I need another shelf in there, and then I'll need fancy baskets to put on that shelf. Before you know it, you have clutter.

I once read about the 100 things challenge. The goal was to cut down the number of items you own to an insane number of 100. This included everything from underwear to shampoo. I don't find this realistic, nor do I think it is a good idea. To me, this would be more expensive. Every time I wanted to do something, I would have to rent or borrow an item. Just one hobby, like gardening, can require many tools. Now add on sewing and art supplies and canoeing. That's a lot of things I wouldn't be able to do. This will not work. I like to do fun things. (Besides, I probably have triple that number in just books.)

Step 1:  Take a room at a time.

Or, maybe even take a part of a room at a time. Here is what I decided to do. Whenever I clean a room, I try to find something that can be discarded/donated. As I type, I'm staring at an ugly set of candle holders. I just haven't had the heart to throw them out since my husband lovingly bought them last minute one year for my birthday. If you can even discard one thing every time you clean a room, it can really add up. Just think of a beautiful "Zen" room while you do this and you will find it easier to let go.

Step 2:  Lose the Clothes (the ones you're not wearing)

Literally, if you are not wearing your clothes, lose them! Another cause of clutter is clothing. Luckily, as a kid, my mother got me into the habit of going through my clothes seasonally to donate to others. This stuck with me and I have improved upon it in the past year. After maternity clothes, post-pregnancy clothes, I'm never going to be thin again clothes, and the new getting thinner clothes, I just had a lot of clothes. There are two options:  donate them, or pack them.

Pack them?
If you have items like maternity clothes or clothes that don't fit right now, you might choose to pack them. Grab some space bags, or just use those giant ziplocks and roll the air out. Don't want the plastic? If you have the space, put them in a box. If you have no space at all, then maybe you don't need them that badly. If you still can't part with them and have some time or money, build or acquire furniture with drawers underneath or a chest. My husband and I built a platform bed with drawers and this picture shows a chest I bought second hand and refinished. (Also, this mess was caused by a cat I was caring for, I'm not quite that messy.)

Donate them?
I call this the "Pick 5 Challenge." You can tackle everything at once, or take chunks. Has the toddler finally fallen asleep? Quick! Empty a drawer from your chest/dresser. (This works if you have your clothes sorted, if not, you might need to take a day off and take out all of your clothes.) Now, pick only 5 of each item to keep and donate the rest. Let me clarify, make the categories you want. Only having 5 shirts wouldn't work for me personally, but I am good with having 5 tanks/undershirts, 5 work shirts, and 5 casual shirts. It does not have to be 5, pick 3, or if you have a lot to deal with pick more. After I did this, I was able to close my drawer without having to do the finger stuff. Now, when I buy something new, I have to take something out and put it in the donate bag.

Repurpose them, too.
If you have any old cotton items, cut these up and use them to clean. If you find an old sweater with holes that no one would want, cut that up too. You can use it to dust, or sew it into mittens, dog clothes, or a tea cozy.

Step 3:  Reduce by Multi-Use

Earlier I mentioned all the tools and items related to hobbies. Maybe we can lose some of those things after all. The kitchen is a good place to start. In the kitchen there has been an explosion of really cool things to buy. They have entire outlet stores dedicated to kitchen gadgets. Let's avoid those stores and look at what you already have. Is there an appliance that is redundant? Learn how to cook rice on the stove and you can lose the rice cooker. If you only use the hand mixer, then you don't really need that stand mixer. If the blender is a distant dream of margaritas never made, then just keep the immersion blender and get rid of the big one. And lastly, if you have enough dishes to go all week without washing, then you can definitely lose some of those. 

Speaking of dishes, let's talk about cleaning supplies. Remember that special toilet bowl cleaner? Save that money, you don't need it! I buy basic ingredients and make almost everything I need. I will have a separate post on specific recipes, but the main idea is vinegar, soda, and essential oils.

Step 4:  Reduce by Losing the Lazy

Maybe you don't have a lot of redundant items in your home but you are determined to reduce. In that case, find things that just make jobs easier and opt for the elbow grease. Leaf blower? Do you really need that? Can you do it with a rake? How often do you really use that mixer? If you're not baking cupcakes every day, maybe you could just mix by hand.


These are steps, in no specific order, and definitely not rules! These things help me, sort of. Still on that path, too.

Monday, June 6, 2016

"Where have you been?"

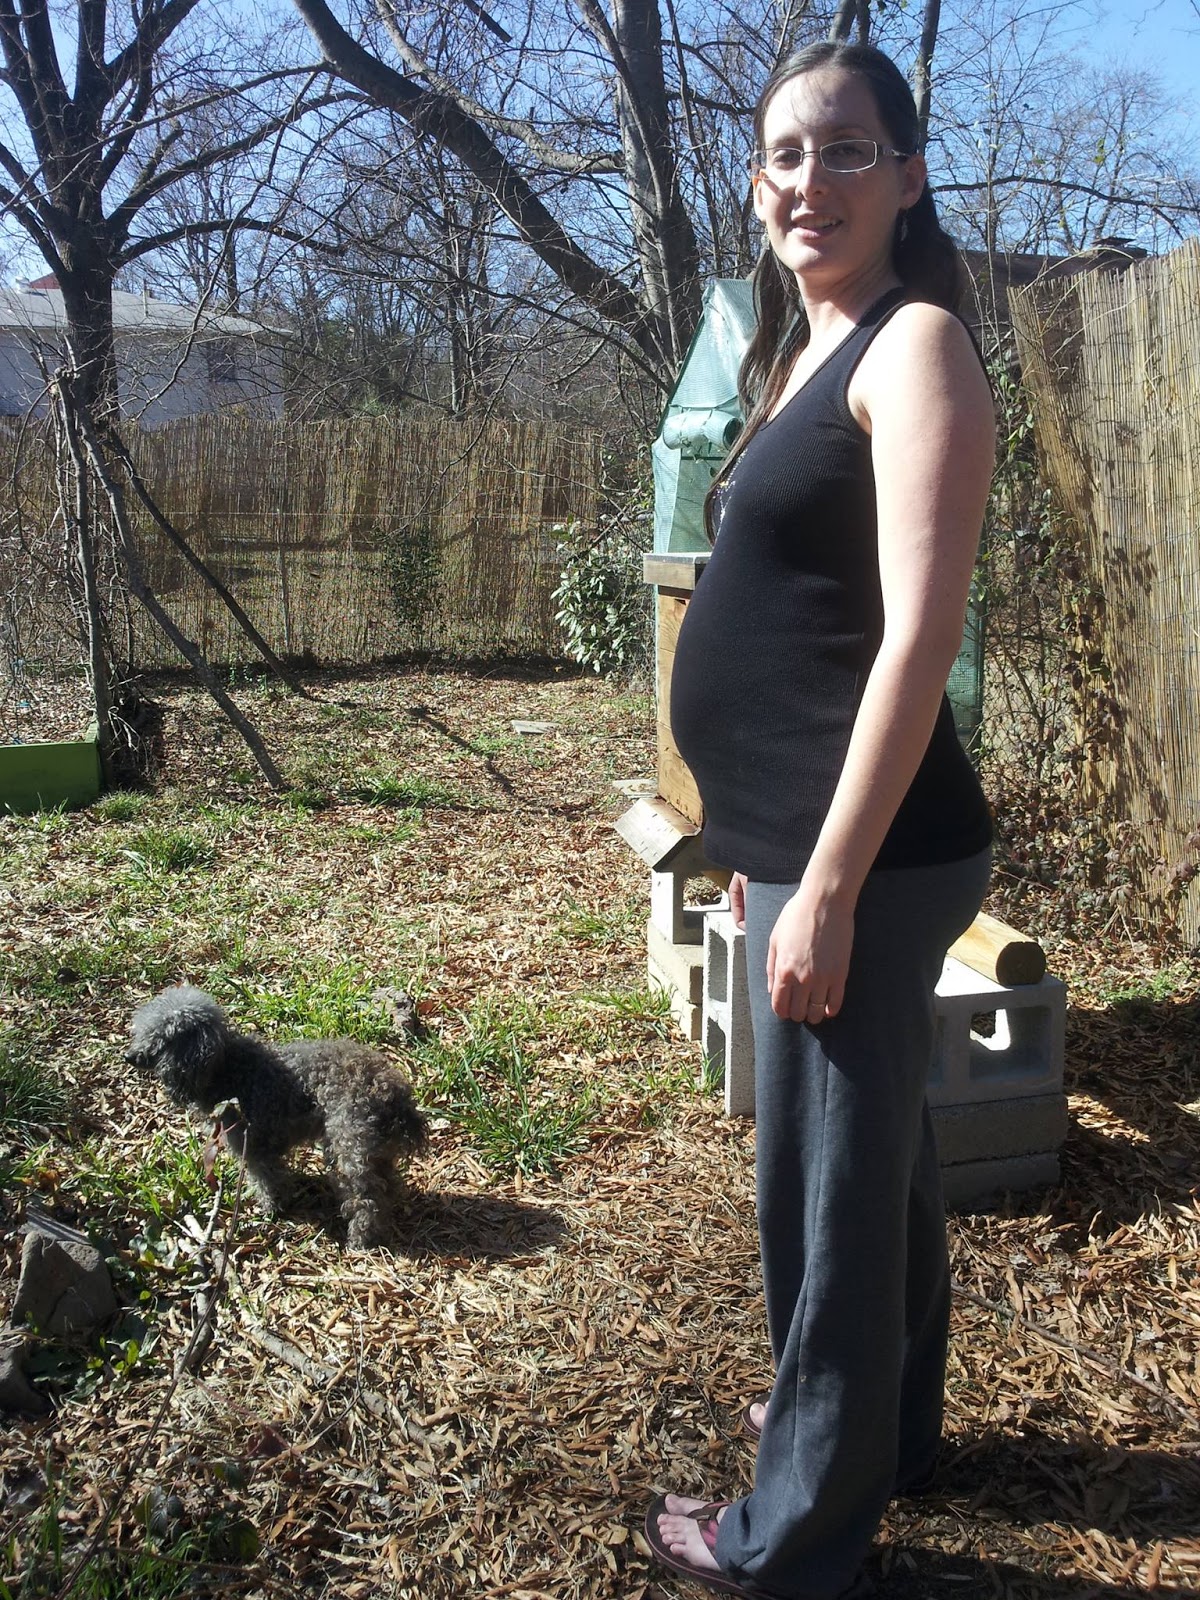
Three words:  Had a baby.

The good news:  I have lots to talk about!

The bad news:  I have more to talk about.

Well, I already knew quite a lot about bees. Now I can confidently say I know lots more about birds and bees. I took a lengthy break from several of my hobbies:  the garden wasn't so fruitful, the yeast died, and the bees, well they did fine for a while but we will get into that later.

To give you an idea of some upcoming posts, here are a list of topics I now feel comfortable sharing:

  • home birth
  • sustainable baby-care practices
  • breastfeeding struggles
  • postpartum depression
  • colony collapse/disappearing bees
  • food budgets
  • herbal healing
  • gardening techniques
I like to stay on topic, and my purpose here is to mainly discuss methods for living a slightly more sustainable life. However, I must say that actually living is a huge part of living sustainably. I feel that the last few years have been very significant regarding the ability of a full time working family to make changes for the better. Life happens. Sometimes it really happens. I want to be realistic with the world and not pretend like my life is full of flowers in my hair, a fully organic diet, zero waste living, and getting everything I need from my backyard. Yes, that would be awesome. But seriously, I don't think that this is attainable for me, nor many families in a similar situation. Maybe one day it will be possible. AT LEAST WE'RE TRYING! And so are many others. Discouragement is not my purpose, just reality checking and continuing on the path.

Thursday, July 4, 2013

It's a Potato 4th of July

Today marked 94 days from the root planting date in our garden. I noticed that most of the potato vines had died off and the cantaloupe has been trying to climb the dead broccoli and invade. I spied some mounding in the dirt and went for a garden fork. Sure enough! Potatoes!

I carefully dug my way from one end of the potato patch to the other and pulled out the best harvest I've ever had in my life! Now, I don't have a scale in my house...which I have just realized might be a little strange...but my husband and I both independently guessed about 20-25 pounds. That is just slightly above the average US yield for potatoes for the square footage we planted. This is a result of the Biointensive planting techniques we are trying out. (Any book by John Jeavons is a great guide!)

Also, I did leave one potato plant in the corner. Although it is past the 90 day period, the plant is still mostly green. Potatoes should only be harvested after 90% of the above-ground growth has died off. Potatoes don't like the heat, and I'm kind of glad about that. I couldn't imagine harvesting these spuds in the heat of late July or August! It was a dirty, sweaty job on a cool day like today.

I do want to mention the reasoning behind planting potatoes. After some research regarding health and diet I have concluded that potatoes are fairly evil for women's bodies (as is white rice and white bread). That being said, one of the major steps toward be self-sustaining is to grow your calories. Growing vegetables is great, and organic fruits and vegetables are vital to your health. But, the truth is, your body needs a lot more calories to survive than fruits and vegetables can provide. Ideally, I would also grow some beans and grains, but I wanted to be cautious this year and plant things I knew I could handle. Also, my husband refuses to eat beans of any kind, so I tried to grow things we would both enjoy, or at least consume. I am aware of the dangers of simple carbs, but I'm not quite ready to mark potatoes off my list of edibles.

That was all the good news, now for some gardening sorrows. The broccoli is dead. There, I said it. I failed at broccoli after being so successful with my completely random crop of last year. Everything was great, the crowns were just showing up, then BOOM! My husband came home and checked the garden and asked what happened to the broccoli. I proudly lit up and stated that it looked great, it is so big because I'm awesome. Then he informed me that they were gone! In one day, between morning watering and evening, the entire crop had been devoured by caterpillars. I saw the signs, and ignored them at a price. I was thinking that a few butterflies would be lovely, I would let them eat a little. Nope, they ate it all, and in less than 12 hours!

Another possible sorrow occurred with the carrots. They look great above ground, but I dug a few up hoping they would be ready, and they were scarcely the size of my pinky. I think I did not thin them out enough. I have transplanted a few to see if that helps.

In the meantime, we continue to harvest a few green beans and tomatoes each day. I have been watering for about 30-40 minutes every other day. This may have to increase as the heat goes up this month. I must keep motivated for the melons' sake.

Tuesday, June 25, 2013

Green Beans, Dryer Balls, and Bees

Summer vacation after my first full year of teaching is somewhat bittersweet. It is too short and I'm too tired! But, alas, after an entire week of doing absolutely nothing, I have gotten back on track with my goal to use this time wisely to improve our sustainable living habits.

Although today was not our first harvest from the mini-farm, it is the most promising. With dozens of green tomatoes waiting to ripen, several melon blossoms waiting to pollinate, and tiny crowns of broccoli waiting to grow, the future looks mighty tasty. There are a few orange tomatoes, but the harvest of today is from my Kentucky Wonder Pole beans. A few weeks ago, I plucked a single green bean from the vine and graciously offered it to our sugar gliders. They were thrilled. Today, I received seven green beans. Just enough for a good side to my dinner. These are more plump than the haricot vert you typically get at a Chinese restaurant, so you need less of them. My favorite way to eat them, however, does follow the Chinese tradition. I simply blanch them for one to two minutes (basically place them in a pot of boiling water) or until the green color seems the brightest. Then I put them in a frying pan with either butter or sunflower oil and some browned garlic. Eat 'em while they're hot!

Something I have always wanted to try is using wool dryer balls. I have heard great things about them. They apparently tumble out the static from your clothes, they decrease drying time by creating
air pockets between clothing, and if you put essential oils on them, they are as good as scented dryer sheets but better for the environment and your family. The downside:  to get four of these things it is almost $40. Well, for $8.24 I bought wool yarn, and for free, I looked up the directions on how to make them! Here is the link to the actual site where I learned how to make them:  http://www.seasonedhomemaker.com/2012/11/how-to-make-felted-wool-dryer-balls.html. I pinned this after coming across it on another site that I am officially in love with:  http://thehomesteadsurvival.com/. They also have a facebook page. Anyways, I have created six dryer balls and still had some yarn left over. Laundry day is Sunday in our house, so we will see how they work out.

Lastly, I wanted to update the beekeeping events of late. My husband and I discovered that the bees have been so productive, that they had nearly filled the entire hive. Four medium hive boxes had all been drawn out with comb and filled, two with brood, and two with honey! To give them some more space we removed one of the frames from one honey super (really...it was for their space...not for the desire to have honey...really). Currently it sits in the freezer, because we are not sure which is the best way to extract the honey just yet. Our investment in this project has been higher than expected and we really don't want to invest in extracting equipment just yet. We had read that it would be a year before we would be able to take from them. So we had some decision making to do in regards to the hive.

Our mentor told us that we should go ahead and put in another brood box and add two more honey
supers. This requires a little more investment as well. We had already ordered a single box when we were able to reach her, and the shipping is not cheap. She also told us that only one honey super needs to remain for the bees over the winter. (If we also intended to provide sugar water.) To be on the safe side, however, we have decided to keep the hive small this year. While having eight hive boxes might be a reality at some point, it is a little more than we can handle right now. Besides, the queen seems to be laying at a good rate and there appear to be bees in all stages of life present:  egg, larva, pupa, bee. It appears that she is handling the space just fine. So, today I have added the new box as a honey super. Our goal is to leave them with two honey supers for the winter and harvest one for ourselves. That still gives us about 30 lbs of honey!

We are very excited and happy about what we have accomplished already this year. We drive by two locations in our area with bee hives, and in comparison, ours appears much more active and healthy. It might be because they are new and healthy, but it also might be some of our own skill and care.

Happy Homesteading!

Sunday, June 2, 2013

The Perfect Loaf


 After making my first natural yeast loaf of bread, the levain, P-Dee, became too powerful. While I was on vacation from work and enjoying a day of junk shopping in Hot Springs, I decided to search for a crock. In the old days, levains were kept in a crock. I have read that this is better because the insulation of the pottery keeps the yeast culture at a more consistent temperature, protecting it from frostbite in the refrigerator. The only downside is that you cannot see what is going on below the surface. I decided if I could find a reasonably priced crock, I would switch from glass.

On Amazon, crocks cost as much as $80 dollars, with some in the $30-$40 range. This is steep for a first-year teacher on a budget plan to eliminate debt. So a day of junk shopping with my mom in Hot Springs seemed the best bet. The first store supplied two options, both beautiful, but slightly too large and still $35. The next shop was better priced, but the crocks were huge ($20). Finally, we arrived at Re-Store, one of my favorite places. They collect donations from individuals and builders alike and supply anything from appliances and furniture to books and dishes. This was the jackpot, or the crock pot. We found several choices and for less than $10. So for $5, I bought a nice sized crock. 

The timing was perfect, too. When I arrived home, P-Dee had exploded! She was growing so fast, that just hours after feeding led to an overflow. I pulled Whea-D out of the fridge for a last inspection and decided to throw her out. I combined my strategies. I fed P-Dee with whole wheat flour this time, and placed her in the new crock, and in the fridge. Finally, everything was running smooth. This was the birth of D, the fourth and final approach to a successful levain (one that is sustainable in the fridge). In addition to this success, the flavor has mellowed out.

Since the creation of D, there have been two successful loaves of bread and a very successful batch of whole wheat blueberry pancakes. The last two loaves also included honey, to try to sweeten the flavor a little. While much milder, the bread still has a unique flavor. 

I have found success in these simple steps:
  • if using tap water, allow to sit for at least 24 hours to let any chlorine bubble out
  • use whole wheat flour, only if the container will remain in the fridge, and buy organic if available
  • use a scale to measure equal parts according to weight, not volume (I use 8 oz. levain, 8 oz. water, and 8 oz. whole wheat flour - this leaves me almost 16 oz. of levain to use before each feeding too.)
  • remember to put a breathable cover on the container to prevent hardening and explosions
  • use a crock to maintain better temperatures
  • feed at least twice per week (I do Wednesday and Sunday)

 In terms of making bread, I have developed this recipe based on the previously mentioned websites:  3 oz. levain, 11.5 oz. water, 1.5 oz. honey, and 17-18 oz. whole wheat flour. Put the first three ingredients into a mixer on low until dissolved. Add about half the flour, mixing on low. Attach dough hook if available. Continue adding flour until the dough pulls away from the sides. The tricky part is the kneading. What works for me is to use the dough hook in the mixer alternating between stir, 2, and 4 (the three lowest settings on my mixer). I tried to time it, and it took about 10-15 minutes before the dough passed the window test. This is when the dough stretches instead of breaks. If it broke too soon, I turned it back to 4 for a minute, then to 2, then to stir, and checked again. I then hand kneaded a few times. (When dealing with wheat dough, the natural yeast book had some great advice:  use water to wet your surface and hands, not flour. Flour will dry the dough out more and whole wheat flour creates tiny tears in the surface. The kneading technique they use, since it is a little tougher than normal dough is the "French Slap." Grab one edge of the dough, sling the other end away from you and up, then slap it on the counter-top and fold the piece you are holding over the top. Grab the edge perpendicular to you, rotate, and repeat. Just watch out for the angry husband who comes stumbling out of the bedroom to ask "What the heck are you doing in here?" It also might scare animals.) After forming a nice large ball, I place it in an oiled bowl, cover with a warm, damp towel and place it in the oven. (If it is cold, you can turn on your oven light to warm up a little, otherwise a room temperature oven is fine.) 6-8 hours later, it should have doubled in size. Gently remove it to a wet surface, fold in the corners to create a small rectangle, and place seam down in an oiled loaf pan. Again, wait for it to double, about 2-4 hours, then bake at 375 for 30 minutes. Let it cool for about 30 minutes if your impatient, or for 3 hours if you want to preserve the moisture inside the loaf. Eat within 5 days, or refrigerate for up to 2 weeks.

So far, this has been a fun and tasty adventure. I am so proud of discovering an almost extinct technique (at least to American households). Why choose between expensive bakery bread (most of which still uses commercial yeast) and flavorless factory bread? Get flavor, health, savings, and a hobby!

Yes, There was Success

There was success that night! I was up very late, trying to make sure this loaf had every chance available to be perfect. While it was not perfect, it was close enough for me! The flavor was incredibly sour, but as my husband put it, the texture was exact. This meant P-Dee had become a legitimate levain. Here are some photos of the whole process, from levain to loaf.


Saturday, May 18, 2013

Success with P-Dee, Well Almost

P-Dee has won the race!

Previously I had split Dee Dee (the original levain) into two separate jars for some troubleshooting. Whea-Dee was kept in the fridge and fed wheat flour twice per week, while P-Dee was kept on the counter and fed all-purpose flour daily. Wednesday night (3 feedings ago) I noticed that P-Dee smelled like a very lovely beer. This is a good sign that yeast cultures are doing their thing. I continued regular, nightly feedings of 4 oz. of water and 4 oz. of all-purpose flour (added to 4 oz. of P-Dee, the remainder was discarded). The smell became more and more rich each night. Last night (Friday) I asked the husband if I should go ahead and try baking. I noted, however, that it had still not doubled in size. The expectation for a healthy levain is to double in size within 6-8 hours (12-24 in the fridge). Although the smell was brilliant and on spot, the size just wasn't there. This morning when I woke up:  PERFECT! The jar I use has cup measurements on the side and P-Dee had expanded from the 1.5 cups to the 3 cup mark. I was so thrilled! Immediately, I began prepping for some baking.

I looked through my Baking with Natural Yeast book, which has been somewhat disappointing lately, and decided I didn't really want to use the recipe in there. For one, it uses measurements by cup instead of by weight, and my experience so far has been much better using my scale. So I pulled out my trusty More with Less book, but couldn't find a simple recipe that I could convert to use the levain instead of commercial yeast. So next, I went to the internet. I tried the two sources posted previously:  King Arthur Flour and NaturalLeavening.com. King Arthur, again, mentions sourdough baking but does not necessarily provide recipes for a maintained levain. The other site has some good looking advice and recipes. I clicked on a basic dough recipe. I followed this so far, except this recipe includes no mention at all of kneading. (strange) I decided to put the dough hook on my mixer and knead the dough until it had almost passed the window test (stretch the dough between your fingers, if it breaks instead of stretching into a translucent dough, then it isn't ready yet). I also removed the dough and oiled a bowl, put a hot, damp towel over the top and then left it to rise. In 8-12 hours, I will either have another brick, or have a doubled-in-size dough ball.

From there, I will attempt to bake in a normal loaf pan. Updates to come on how the first loaf turns out!

Sunday, May 12, 2013

Levain: French term for a bread leavening agent


Time for some experimentation. I’ve been trying to get my levain (natural yeast starter) going for a few months. According to my original resource book, which I am now discovering contains various annoying errors, I should be able to bake bread by now. This is not the case. My book talks about the levain doubling in size after feedings, but mine never has. It stays the same size and just slowly “fizzes.” No big happy bubbles like expected. I have successfully created a few batches of waffles and crepes, but when I finally ventured into the full loaf of bread arena, I discovered a lifeless blob of dough in the morning. Solution:  more research.

I have come across these helpful websites:

http://www.naturalleavening.com/kitchen-help-recipes/ - recommended by my book, this site also sells “old world” levains.

http://www.kingarthurflour.com/blog/2012/04/08/maintaining-your-sourdough-starter-food-water-and-time/ - this website just happens to be the brand of the flour I have been buying and contains loads of good info, although they refer to everything as a sour dough starter, which I view as something slightly different.

While tempted to chunk out the levain I have lovingly nicknamed DeeDee, I have decided to hold off and try a few experiments. The Natural Leavening website has a sale on their Hard White Wheat Levain, but I really am determined to succeed with what I have.

First, according to King Arthur, when storing a sour dough starter in the fridge, you prevent daily feeding and can use weekly feeding. This is relatively accurate to what I have been doing, except I feed twice a week. They mention that the starter should then be left at room temperature and fed daily just before using to bake. This gets the yeast working and ready to go. This makes since, but contradicts what my original book states and what the Natural Leavening site claims. These sources say it should be ready to use with just one 12-hour rise. I am open-minded, however, and will be splitting my levain tonight and using the room temperature, daily feeding method. I will also reduce this portion to 4 oz. and use feedings of 4 oz. water and 4 oz. flour to save on flour.

Second, the King Arthur website also mentioned some interesting details about types of flour. In response to one question on their blog, they noted that unless the starter was to be refrigerated, it should be fed all-purpose flour. Wheat flour has a tendency to go bad at room temperature. They also noted that the use of whole wheat flour is a good idea due to the presence of more lactobacilli and wild yeast, which can be less likely in the “more sterile” all-purpose flour. For this reason, the other half of Dee Dee will remain in the fridge, but I will begin feeding this one with whole wheat flour twice per week.

Third, I have become aware of the importance of measuring weight for feeding instead of volume. Both sites mentioned the importance of weight. I happen to have a food scale, bought years ago, that has been living on my husband’s workbench to weigh remote-control airplane parts. Now I finally have a good excuse to steal it back. One problem I may have been having is the difference between volume and weight! My original book stated 1 cup of water and 1 heaping cup of flour. Out of curiosity I just measured the weight of what I have been feeding Dee Dee. I have been feeding 8 oz. of water but only 5 oz. of flour! That is a big difference! The poor dear has been starving, no wonder she isn’t happy!

With this information, I venture forward in the world of growing healthy, happy bread in my own home. Whether it is the temperature of my refrigerator, the type of wheat, or the amount of wheat, I will discover my faults. If none of the above works, then it is time to purchase a levain and try again.

So long Dee Dee, now I have Whea-Dee and P-Dee.

Wednesday, April 10, 2013

Spring Work and Its Rewards

“Spring work is going on with joyful enthusiasm.”
― John Muir, The Wilderness World of John Muir

Well, it's not all joyful, but most of it is. It has been an interesting seasonal transition to say the least. My first round of seedlings, planted according to the earliest start date for transplants, did not last very long at all. Quickly, I adjusted my planting calendar in my journal and started a second batch. Now that batch has also perished. I have never had much luck sprouting seedlings indoors. I think I will just go ahead and purchase some tomato and broccoli transplants. The good news is, I have an abundance of life happening outside!

On a beautiful afternoon (March 29) I began planting some outdoors seedlings. 50 potatoes (19 small yellow, 13 red, and 18 large yellow), 4 square feet of carrots, 2.5 square feet of lettuce, 16 green beans, and a second round of 21 spinach. Today, all of these were showing beautiful green signs of life. Of course, this downpour/tornado tonight is not very promising, but at least I took photos to prove I didn't do it all wrong! Surely everything will do fine. They all survived the hail just two days after being planted, and a few nights near freezing.


In addition to edibles, I splurged a little on some annuals and an azalea, in preparation for my bees. I picked a semi-shady bed where I have had little luck, so I chose light colored begonias and some petunias. From my time spent working for a landscape architect (a very good one), I learned a few things. One thing is that plants can sometimes be like people. For example, there are different types
of begonias, those with dark green foliage and those with lighter green foliage. Like skin, the darker leaves can handle more sunlight without burning. So if you have a sunny spot, get the darker variety and vice versa. Anyways, I planted one azalea surrounded by 12 white blooming begonias, and 18 pink petunias. We'll see if they last, and if they don't, oh well, they're annuals!

Now for the most joyful, enthusiastic news:  we have bees! At the April Lady Beekeeper's Association meeting I gave a nuc box complete with 5 frames to the president. She had promised a swarm for me and I wanted to be prepared. Then, just two days ago, on the way home, I got the call. "Stephanie, we have your bees. You can come get them today." So off we went, bee suit at the ready, and jumped in my husband's car (I drive a hatchback, which is no good for transporting a box of bees, unless you want to drive in your bee suit...). We arrived to find the bees neatly packed in a box and tied with a piece of twine. Just like a beautiful, buzzing present. After some discussion, we headed home where they were set atop our hive to spend the night. To keep them fed while they were enclosed, we mixed 4 lbs of sugar with 1 gallon of water, heated until dissolved, then put in a spray bottle, and sprayed the bees through the air vents.

With the impending storms of Wednesday, I rushed home Tuesday to see if they were situated enough to be moved to the hive. Sure enough, I saw lots of activity and heard lots of buzzing. When we originally picked up the box, a number of bees had been trapped on the outside. They were still very much attached to their colony and not wanting to be separated. We managed to make it home with at least a dozen or two attached to the outside. Yesterday, I could tell that these bees had been exploring and bringing back some pollen and nectar to the box. All very good signs.

Once my husband arrived, we lit the smoker, prepared two feeders with the sugar-water solution, and took all our gear outside. The moving process was fairly easy. It was very exciting, but we were both nervous. At one point, my husband even mentioned that his confidence was not as high as when we had our "mentors" with us. In fact, we video taped the entire process and I realized while watching it later that I got a little too happy with the sugar water and probably overdosed everyone in a five mile radius on sugar. The good news is we got all the frames into the hive, added some more empty frames to fill up both hive boxes, and put everything back. Naturally, there were some bees who did not make it inside the box with the frames, but by dark, most had found their way into the hive and were safe and secure.


Saturday, March 9, 2013

First hands-on Beekeeping experience

I started the day at an Organic Gardening Seminar learning about how to run an organic farm. Although most of the information in this seminar was well above my ability and land availability, I did learn a few new things about extending my growing season, how to build a seedling shack, and some basic organic pest control. I also enjoyed learning about some of the tools and tractors that are available. But the real fun came this afternoon.

While at the seminar I received a call from the president of the Lady Beekeepers. She was going to inspect her hives today and wanted Kevin and I to join them to get some real hands-on experience. Naturally, I first had a moment of panic. Was she really wanting us their? Would we be imposing? Would they be finished before we got their? But, as he always does, Kevin managed to keep me calm and insist that we should go and learn as much as we can. So we grabbed our bee garb and hit the road.

I purchased a jacket and bee hood combination that is conveniently sealed quite well. This combined with my XXXS gloves made me very confident. I simply tucked my blue jeans into my socks and was ready to go. Kevin, on the other hand, was not blessed with an outfit. He simply got stuck with the standard equipment from the beginner's kit we purchased:  helmet, veil, gloves. We managed to make it work, though. We duck-taped his waist and the veil to try and keep out any curious bees.

We cautiously walked across the field behind the house. I suddenly became very aware of how tiny our yard is and how close our hive will be to every square inch of my garden. But anyways, we were ready to encounter our first cloud of bees. President and husband are very friendly people and they greeted us first by inspecting that we were sufficiently protected. (It was their idea to tuck our jeans into our socks and tape down Kevin's veil.) Then, we dove straight in. I watched as they unstacked a hive box, carefully loosened each frame, and then inspected the frames for content. Some contained honey, some contained brood and honey, and some were just being laid with brood by very busy queens. We did get to see 3 queen bees (each in different hives, of course). Very beautiful creatures.

We talked about scraping off comb that was built on the outside of the frames and removing the propolis (bee glue made from pine sap to fill cracks or otherwise seal all the frames and boxes together). We also talked about things like feeding (5lbs of sugar per gallon of water, with a hint of peppermint oil in the first batch to prevent tracheal mites). We learned about removing a few unfortunate drone larvae to inspect for varroa mites and also how to spread a bead of food-grade mineral oil on top of each frame to prevent the same.

Kevin also learned what it feels like to get stung (or rather was reminded). After about an hour, one managed to get inside his veil. We were able to remove this one without any problem, but then while walking one innocent bee was resting on his Achilles heel and was smashed against the back of his boot. In response, she stung him through his sock. He managed to not scream profanity, but he did seem quite surprised. So far, it only hurt for a little while and there doesn't appear to be any swelling.
Needless to say, we learned a great deal. The best part is that hands-on experience is priceless. Having just a little bit of time gives you the confidence to do it on your own. You can read and research all you want, but it just isn't the same as getting your hands dirty. She told us of an old man who helped them get started with their hives. Now they are passing that to us, and one day we will pass it to another.

Equipment and tools are the biggest challenge in terms of investment. Honestly, when I chose bees over chickens, I assumed we would be spending less money, but this does not seem to be the case. So far we have purchased the following items:  Hive kit (boxes, frames, base, screen bottom board, inner cover, metal-topped outer cover, foundation), a nuc box, beginner's kit (helmet, veil, gloves, book, bee brush, 2 feeders, hive tool, smoker), hooded jacket for me, gloves for me, another book (kids book for my students), a frame spacer tool, wire, wire embedder, brass eyelets, eyelet tool, a backup hat/veil for guests, a frame holder, and eco wood treatment.

I am sure this list will continue to grow, but we have the main items needed to get the bees for sure. (I am still awaiting the arrival of the foundation. I have emailed Kelley Bees a third time regarding the foundation that was supposed to be in my original order. I have only heard that they were checking to verify that it was not shipped, but nothing else so far. This is frustrating given that the bees will swarm in the next month or so, and our frames aren't complete until we have it.)

So, now we wait. We wait on the remaining tools and foundation to arrive, and for the bees to swarm. The swarm will most likely occur in April. We installed a reed privacy fence of sorts around the part of our yard that touches our neighbor. This will be good to keep the bees out of sight and it will also cause them to fly above anyone outside the yard as well. Bees tend to fly up and over obstacles and only descend on a source of pollen, so getting them to fly up usually keeps them out of people's hair (literally). Honestly, my only concern is when the neighbor mows, since the noise might disturb the hive, but the reeds should help with this too. Today we also "painted" our boxes with the eco wood treatment. Really, my next steps are to continue growing my yeast starter, and tending my garden. I am well aware of a busy growing season ahead, so a little down time, while in some ways disappointing, is still appreciated.